A Step-By-Step Sewing Machine Review: Janome DC2010


So far on The Flora Modiste we've covered a ton of topics.. What's in my sewing kit. How to read a sewing pattern. How to sew with stripes. But I have yet to cover my most valuable tool: My sewing machine. In this post, I am going to do a fully comprehensive sewing machine review of my BFFL: My Janome DC2010 sewing machine.
I have had this baby since I was in college, back in 2010. My (now) husband actually bought it for me as a Christmas present the winter that I applied to the Fashion Design program at FIDM. It was quite the surprise, walking out to this giant wrapped box (being a super broke college student at the time) on Christmas morning.
He was so cute, he went to this little sewing machine shop in town, and spent a whole day talking with the women at the shop about which machine to purchase. At the time, I had this dinky little Brother mini sewing machine that cost like $50 from Sears.
Suffice it to say, neither of us knew anything about how to buy a well made sewing machine. But he did his research, and he ended up buying this beauty!

It runs beautifully, and has done everything I could ever ask of it. I truly believe it is a perfect sewing machine for the modern seamstress sewing up her own wardrobe from home.
With my DC2010, I have made coats, dresses, skirts, blouses, pillows, bags.. You name it, I've probably made it using this sewing machine.
 I am also pretty terrible with sewing machine maintenance.. It's a bit embarrassing actually.
But even with my lack of maintenance, the machine is still running beautifully. (Maybe that should be a next post, how to properly maintain your sewing machine? Anyone interested? I could use a refresher myself.)
Also, amazingly, the lightbulb on this machine HAS NEVER GONE OUT.

I've used this thing SO MUCH over the past 7+ years. Literally every day while I was in school at FIDM, and pretty much weekly since I started working on launching The Flora Modiste about a year ago.
Anyways. This sewing machine review is going to cover everything you may need to know about this machine, and why I love it so much. So. Let's get started, shall we?
(Ready to get a sewing machine? You'll also need a sewing kit! Grab your complete beginner's guide & shopping list below.) 
Sewing machine review: Janome DC2010

Looking at the DC2010, it has pretty much all of the same features that most sewing machines have.
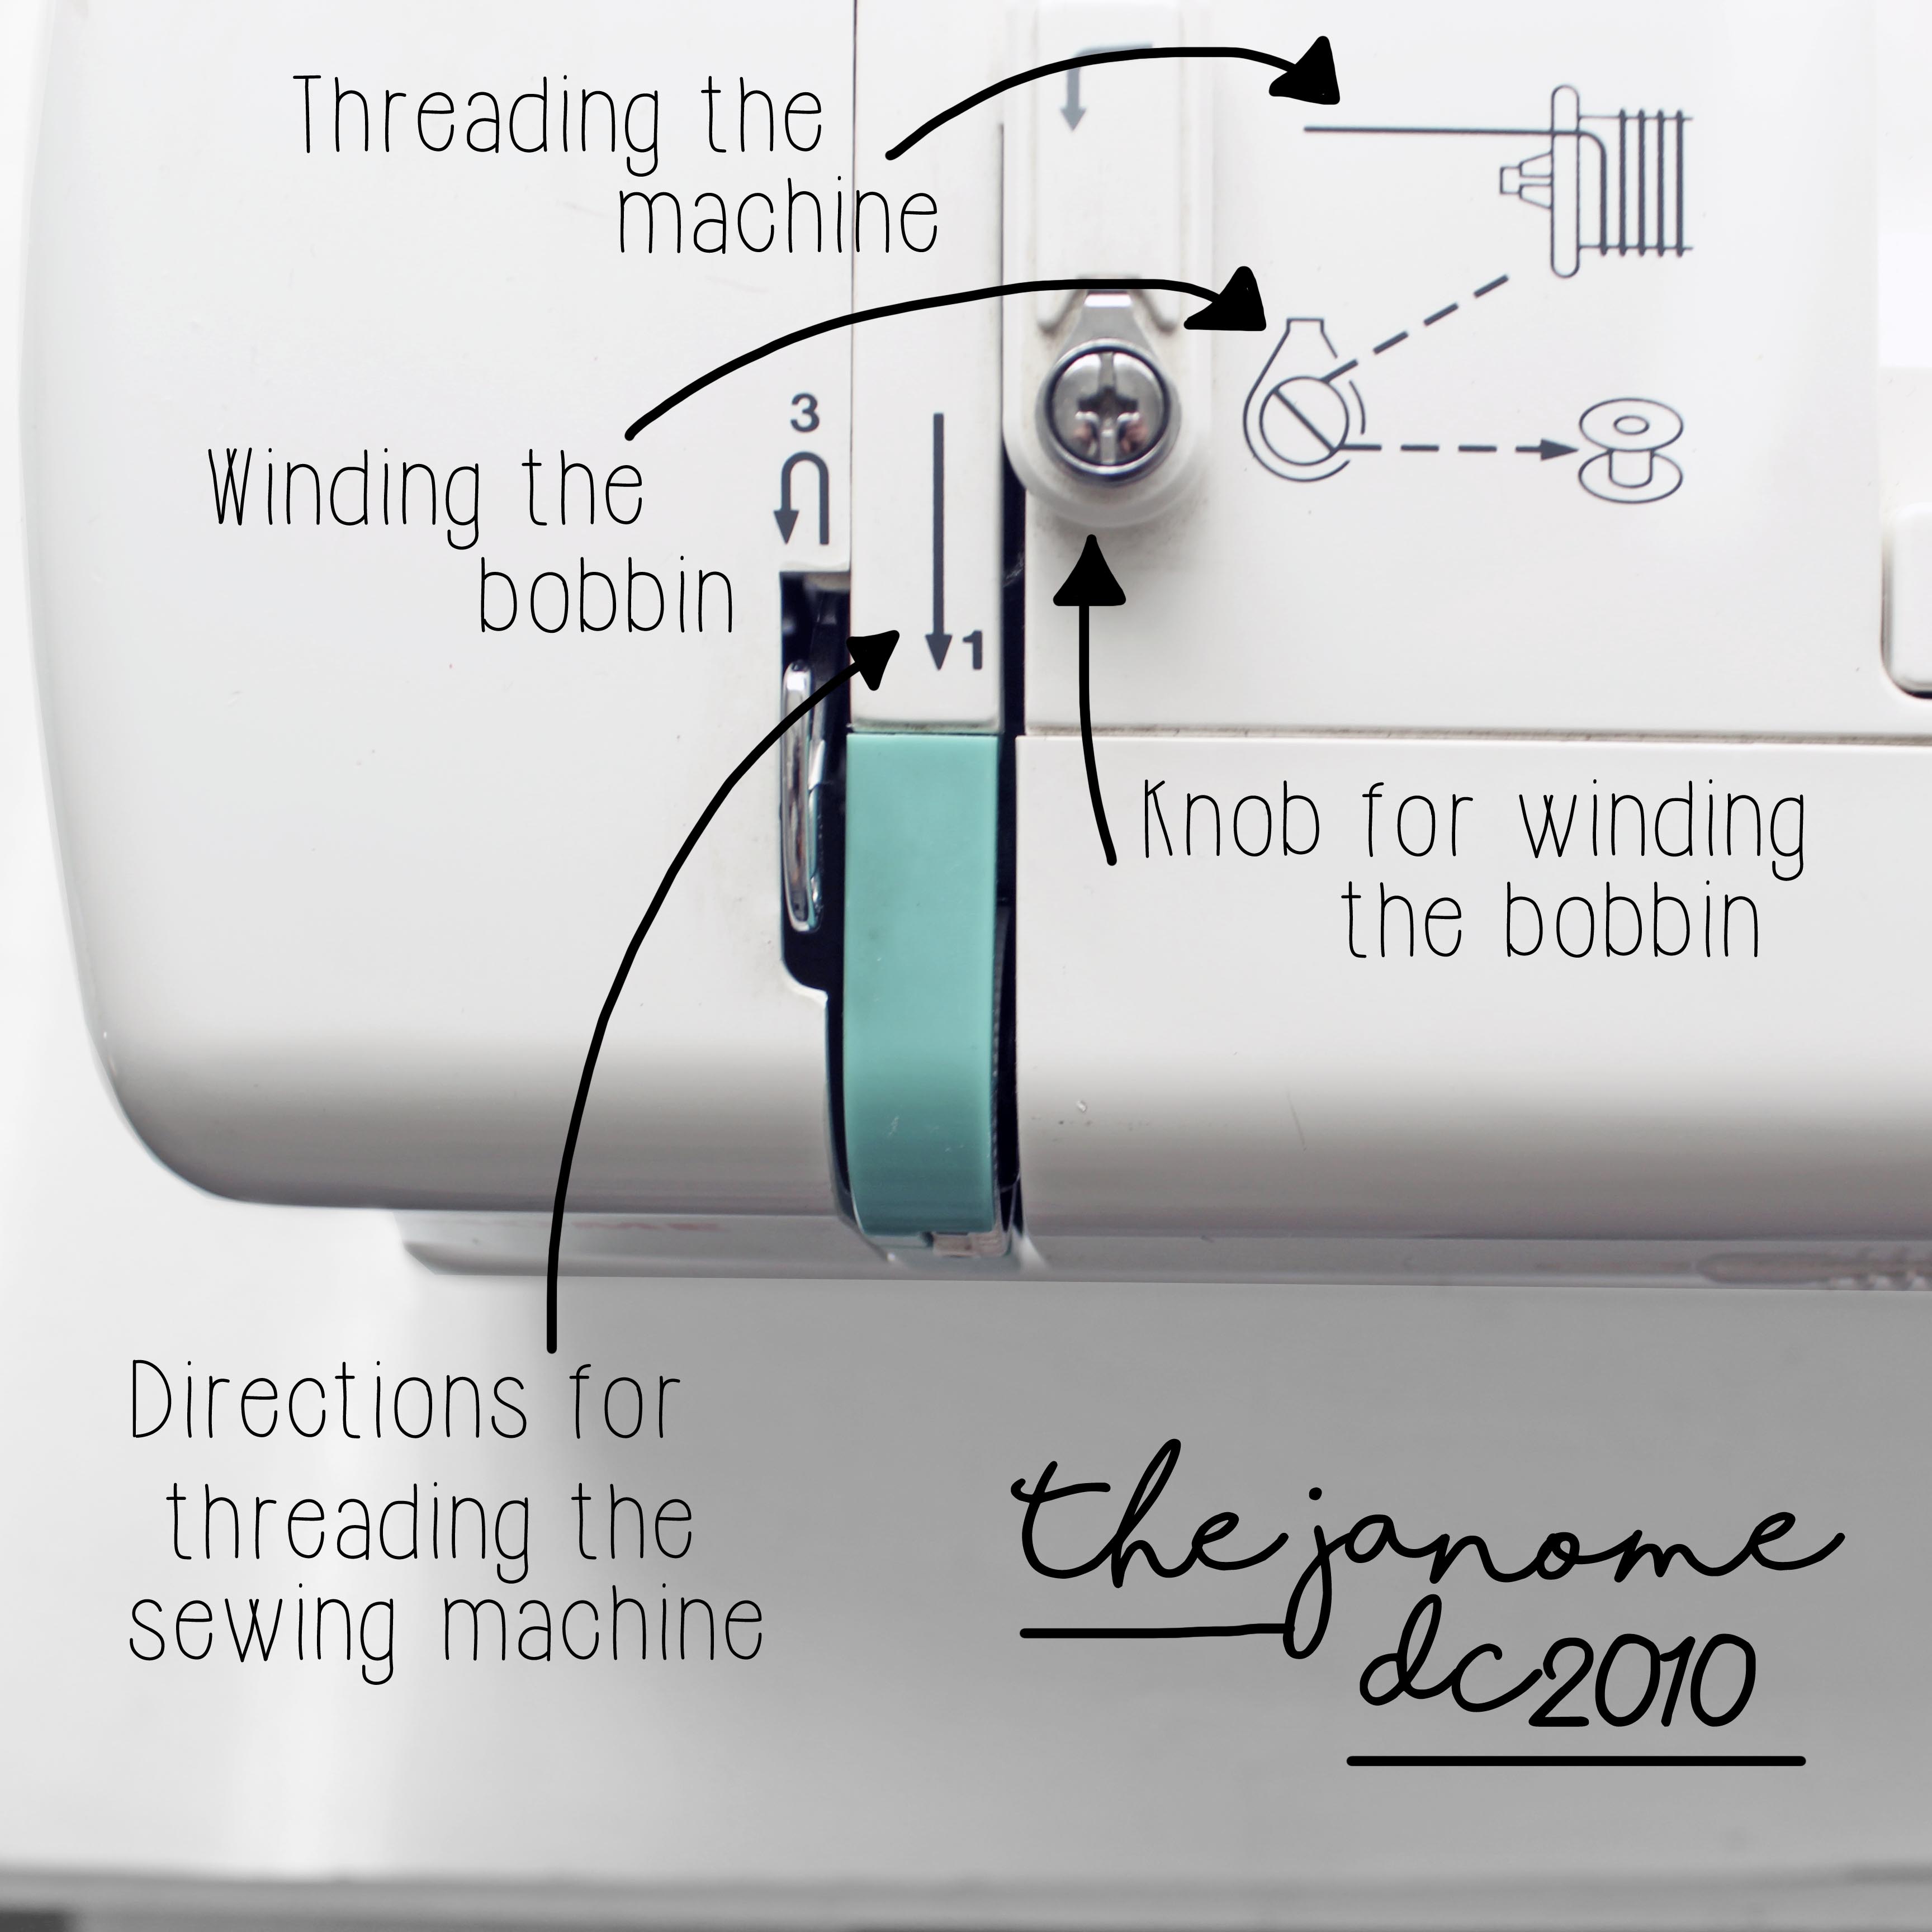
Up top, we have the thread holder, along with the knobs for winding the bobbin and for threading the machine. I particularly love machines that have the instructions for threading the machine fully displayed.. It can be so easy to forget (since every sewing machine is different) so I love that they are right there.
There is also a handle that pops up, for when you need to carry the sewing machine around.

Moving down the face of the sewing machine, there is an easy knob for adjusting the thread tension. There is also a dial for adjusting the speed at which you prefer to sew. (Slower if you are a beginner, or faster if you are more experienced.)
Continuing down towards the needle, there are two buttons. I have never used these buttons. Not once, not ever.

But I HAVE used the backstitch button below. This little beauty of a button is a wonder, life would be so much more difficult without it.
The most dominant feature of the DC2010 is the section in which all of the different stitches that this machine is capable of are listed out.

Above all of the stitches, the electronic screen tells you three different, very important things:
- The number of the stitch that you are currently using.
- The width of the stitch that you are currently using.
- The length of the stitch that you are currently using.
Adjustments for all three settings can be changed using the buttons directly below the electronic screen. But more often than not, I am always using stitch #1, with the width and length of stitches somewhere in the middle.
(Ready to get a sewing machine? You'll also need a sewing kit! Grab your complete beginner's guide & shopping list below.)  There are a total of 50 different stitches that can be sewn with this machine. Now, this may not seem like a lot with all of the legit electronic, smart as sewing machines that are available today.
But back in 2010, to me, this seemed like A WHOLE LOT.

No joke.

Obvi I use stitches 1 & 2 for basic sewing, and I would often use stitch #14 before I bought a serger. That stitch is ideal because it is a serger-like stitch (obvi not as clean as a serger) but it will get the job done if you can't yet afford one.
I really don't think I have ever used the bulk of the stitches, other than to just mess around and test them out. But it's always nice to have options, right?
Moving on over to where the action happens with the sewing machine: The needle. Getting needles in and out of the machine is pretty simple. I've used machines where it's nearly impossible and SO frustrating.

Tightening and loosening the screws for the sewing foot is also incredibly easy, which I am so thankful for.
The foot does get loose with excessive sewing, and I am always SO very happy that these are easy to reach.. Imagine you are sewing mid project, and your foot just falls off because you aren't able to tighten it when it starts to loosen. Not fun. But not an issue with this baby!
There is also a little knife to the left of the needle, for cutting thread. (Literally a deal breaker if a sewing machine doesn't have this. Don't compromise.)

And I think we have reached my favorite feature of the DC2010.. The measurements etched into the faceplate. Oh how I love these measurements. I would be lost without them.
Having the measurements etched on the faceplate ensures that you follow the same seam allowance when sewing.. Which is something that I can definitely struggle with. And that's WITH the faceplate measurements.

The little plastic cover that holds the bobbin and thread also has threading instructions printed on it, which is always very helpful for the beginning seamstress. The plastic cover pops out easily so that you can access the bobbin for rewinding.
The DC2010 also has a small little storage area that pops open. This is an ideal place to store extra bobbins, sewing needles, and small sewing tools.
I prefer to just keep all of my tools in my toolbox, but this little storage area is ideal when traveling to school or work.
(Ready to get a sewing machine? You'll also need a sewing kit! Grab your complete beginner's guide & shopping list below.) 
There isn't too much to tell about the back of the machine. The model & serial numbers are all listed out, which makes it pretty easy for identification purposes. (NO idea where my original booklet for this machine is, so it's helpful having that information there.)
You can also see a knob popping out on the side. All sewing machines have this, it's for manually raising and lowering the sewing needle.
There is also a little black handle, close to the sewing needle. Can you see it? That is used to lower and raise the actual sewing foot. Teal knob is for the needle, black handle is for the foot.

And one final, not so glamorous reason that I love the Janome DC2010.. All of the machine's actual parts are easily accessible. The head for accessing the machine's parts simply pops open--No screws, plates, nothing. That way, if you ever have an issue with the machine (which I have not) then you can easily get to all of the moving parts.
Getting to the little section under the sewing faceplate does require unscrewing a single screw.. But it is SO easy.
The plate literally just pops out, and is just as easy to screw back in. (This is where you clean the machine of all lint and dust.. I really need to do that.)

In case you are interested in the actual specs of the machine, here they are:
- Weight: 15 lbs
- Measurements: 15" x 11" x 7"
- Price: $699 on Janome's website (Although they are only selling the newer versions of the 2010--The 2012 is the closest in age to my 2010)
And that's pretty much all there is to it! This sewing machine is so incredibly easy to use, I would be lost without it. There aren't any crazy bells and whistles to it, but it's durable and it gets the job done.
Are you looking to buy your very own sewing machine and are curious about the Janome? Let me know of any questions, I'd love to talk sewing machines!
(Ready to get a sewing machine? You'll also need a sewing kit! Grab your complete beginner's guide & shopping list below.)


![]()
![]()
![]()


