How To Sew With Stripes: The Dany Sheath Sewing Tutorial

And alas, we have our second sewing tutorial of the new year! This tutorial is based off of this month's sewing project, the Dany Sheath. And with this sewing tutorial, I will be showing you how to sew with stripes. (Because honestly, who doesn't love stripes?)
I know, I know. You're probably saying: "Why would I ever need a sewing tutorial for learning how to sew with stripes?"
Well my friend, it's a bit trickier than it sounds. The biggest challenge with sewing stripes is making sure that the different striped lines match up perfectly.

Well.. When I was shopping in Portland over the holidays, I saw a super cute sheath (similar to the Dany) in a checkered/striped fabric. And the big, bold, black lines front and center on the dress didn't match.
They were completely off.. Like inches off. And it looked absolutely awful--I was a bit shocked that they were actually trying to sell the dress. (And it wasn't cheap, either.)


So. Even big retail companies and small boutiques make the mistake of not knowing how to properly sew with stripes. There really isn't a good excuse for this.. It may seem a bit harsh, but it's laziness, pure and simple. Or maybe a lack of caring?
Either way, it's not good, not fun, and not particularly a company that I want to support.
It's hard to know why a finished garment would end up like that.. It could be that the pattern drafters didn't properly mark the pattern. Or maybe the cutter just didn't notice when he cut the different pieces out.
Or maybe the seamstress knew it was too late after cutting the fabric, so she didn't say anything when sewing the damn thing up. Either way.. Do those sound like workers who truly care about their work?

I have worked with drafters, cutters, and sewers that love their work and would 100% notice stripes being off. They would tell us before anything was finalized, and would ensure it was fixed.
I have also worked with those that don't care, and are only interested in a paycheck.

Again, I know this may seem like an overreaction about a single dress.
But it's these things that you need to think about when purchasing something. What you buy does make a difference, and it does have an impact. (I actually went into this in some detail a few months back.. Check out the post in which I explain why it's important to stop buying fast fashion.)
ANYWAYS. I have a deep, deep love for stripes of all shapes and sizes.

I am automatically drawn to anything striped when I go into a shop.. It's kind of a problem.
I didn't even realize I was subconsciously drawn to them until I was in a shop with my sister one day. I was looking at this beautiful striped dress, and she just came up to me and said, "You have a problem. Walk away from the stripes."


I don't know what it is that I love about them. I'm not a huge fan of printed patterns on clothing, I usually go for solids. So I think that stripes may be a type of design compromise.. They are a type of printed pattern, but they are also the most basic printed pattern in existence.
Whatever it is, I love love love them. So when I was in that shop in Portland, I resolved that I was going to do a sewing tutorial on how to PROPERLY sew with stripes.
Stripes can look SO good when sewn properly.. But can look SO bad when done improperly. So. Let's learn how to sew them properly, shall we?
How to sew with stripes sewing tutorial: Step 1
Sewing stripes properly begins before the fabric for your project is even cut. It begins with the pattern.


Lay out all of the pattern pieces for your garment that will be sewn with the striped fabric. Measure the width of the stripe on your fabric, as well as the distance between the stripes. Note the measurements on a separate piece of paper.
NOTE: We want to separate the pattern pieces that will be sewn with the striped fabric because we will be marking these pattern pieces up in the next step. No use doing extra work and marking up the pattern pieces that aren't being sewn with the striped fabric! (i.e. Linings, facings, etc.)
How to sew with stripes sewing tutorial: Step 2
Now that we have our pattern prepped and our measurements ready, it's time to mark up the paper pattern.
(This step is pretty easy, it can just be a bit meticulous and time consuming. So be ready!)

We want to physically draw the stripes on the pattern pieces. This ensures that there can be NO mistake as to where the pattern pieces need to be placed on the fabric before pinning and cutting.
Grab the biggest patten piece first. (In the case of the Dany, I grabbed the center front panel of the dress.) According to your stripe measurements, physically draw said stripe on the pattern, from left to right.
If you have thick stripes, draw in the full stripe with a thick marker. If you have thin stripes (like on the fabric for the Dany) draw the lines as the same width, using a thin tipped marker. Draw 2-3 sets of the stripes, with the space in between.
It doesn't really matter WHERE on the pattern you draw these (whether the top or the bottom) it's just important that you have these initial stripes drawn.

NOTE: Before proceeding to the second and third set of stripes, ensure that your markings match the fabric using a pencil. It's no use drawing the stripes on the pattern if your measurements are off and they don't match that of the fabric you will be working with.
How to sew with stripes sewing tutorial: Step 3
Once you have 2-3 sets of stripes properly drawn on your pattern, you are ready to draw the rest of the stripes on the pattern piece.
If you are inexperienced with sewing stripes, I would recommend drawing every stripe that is on the fabric onto your pattern piece.

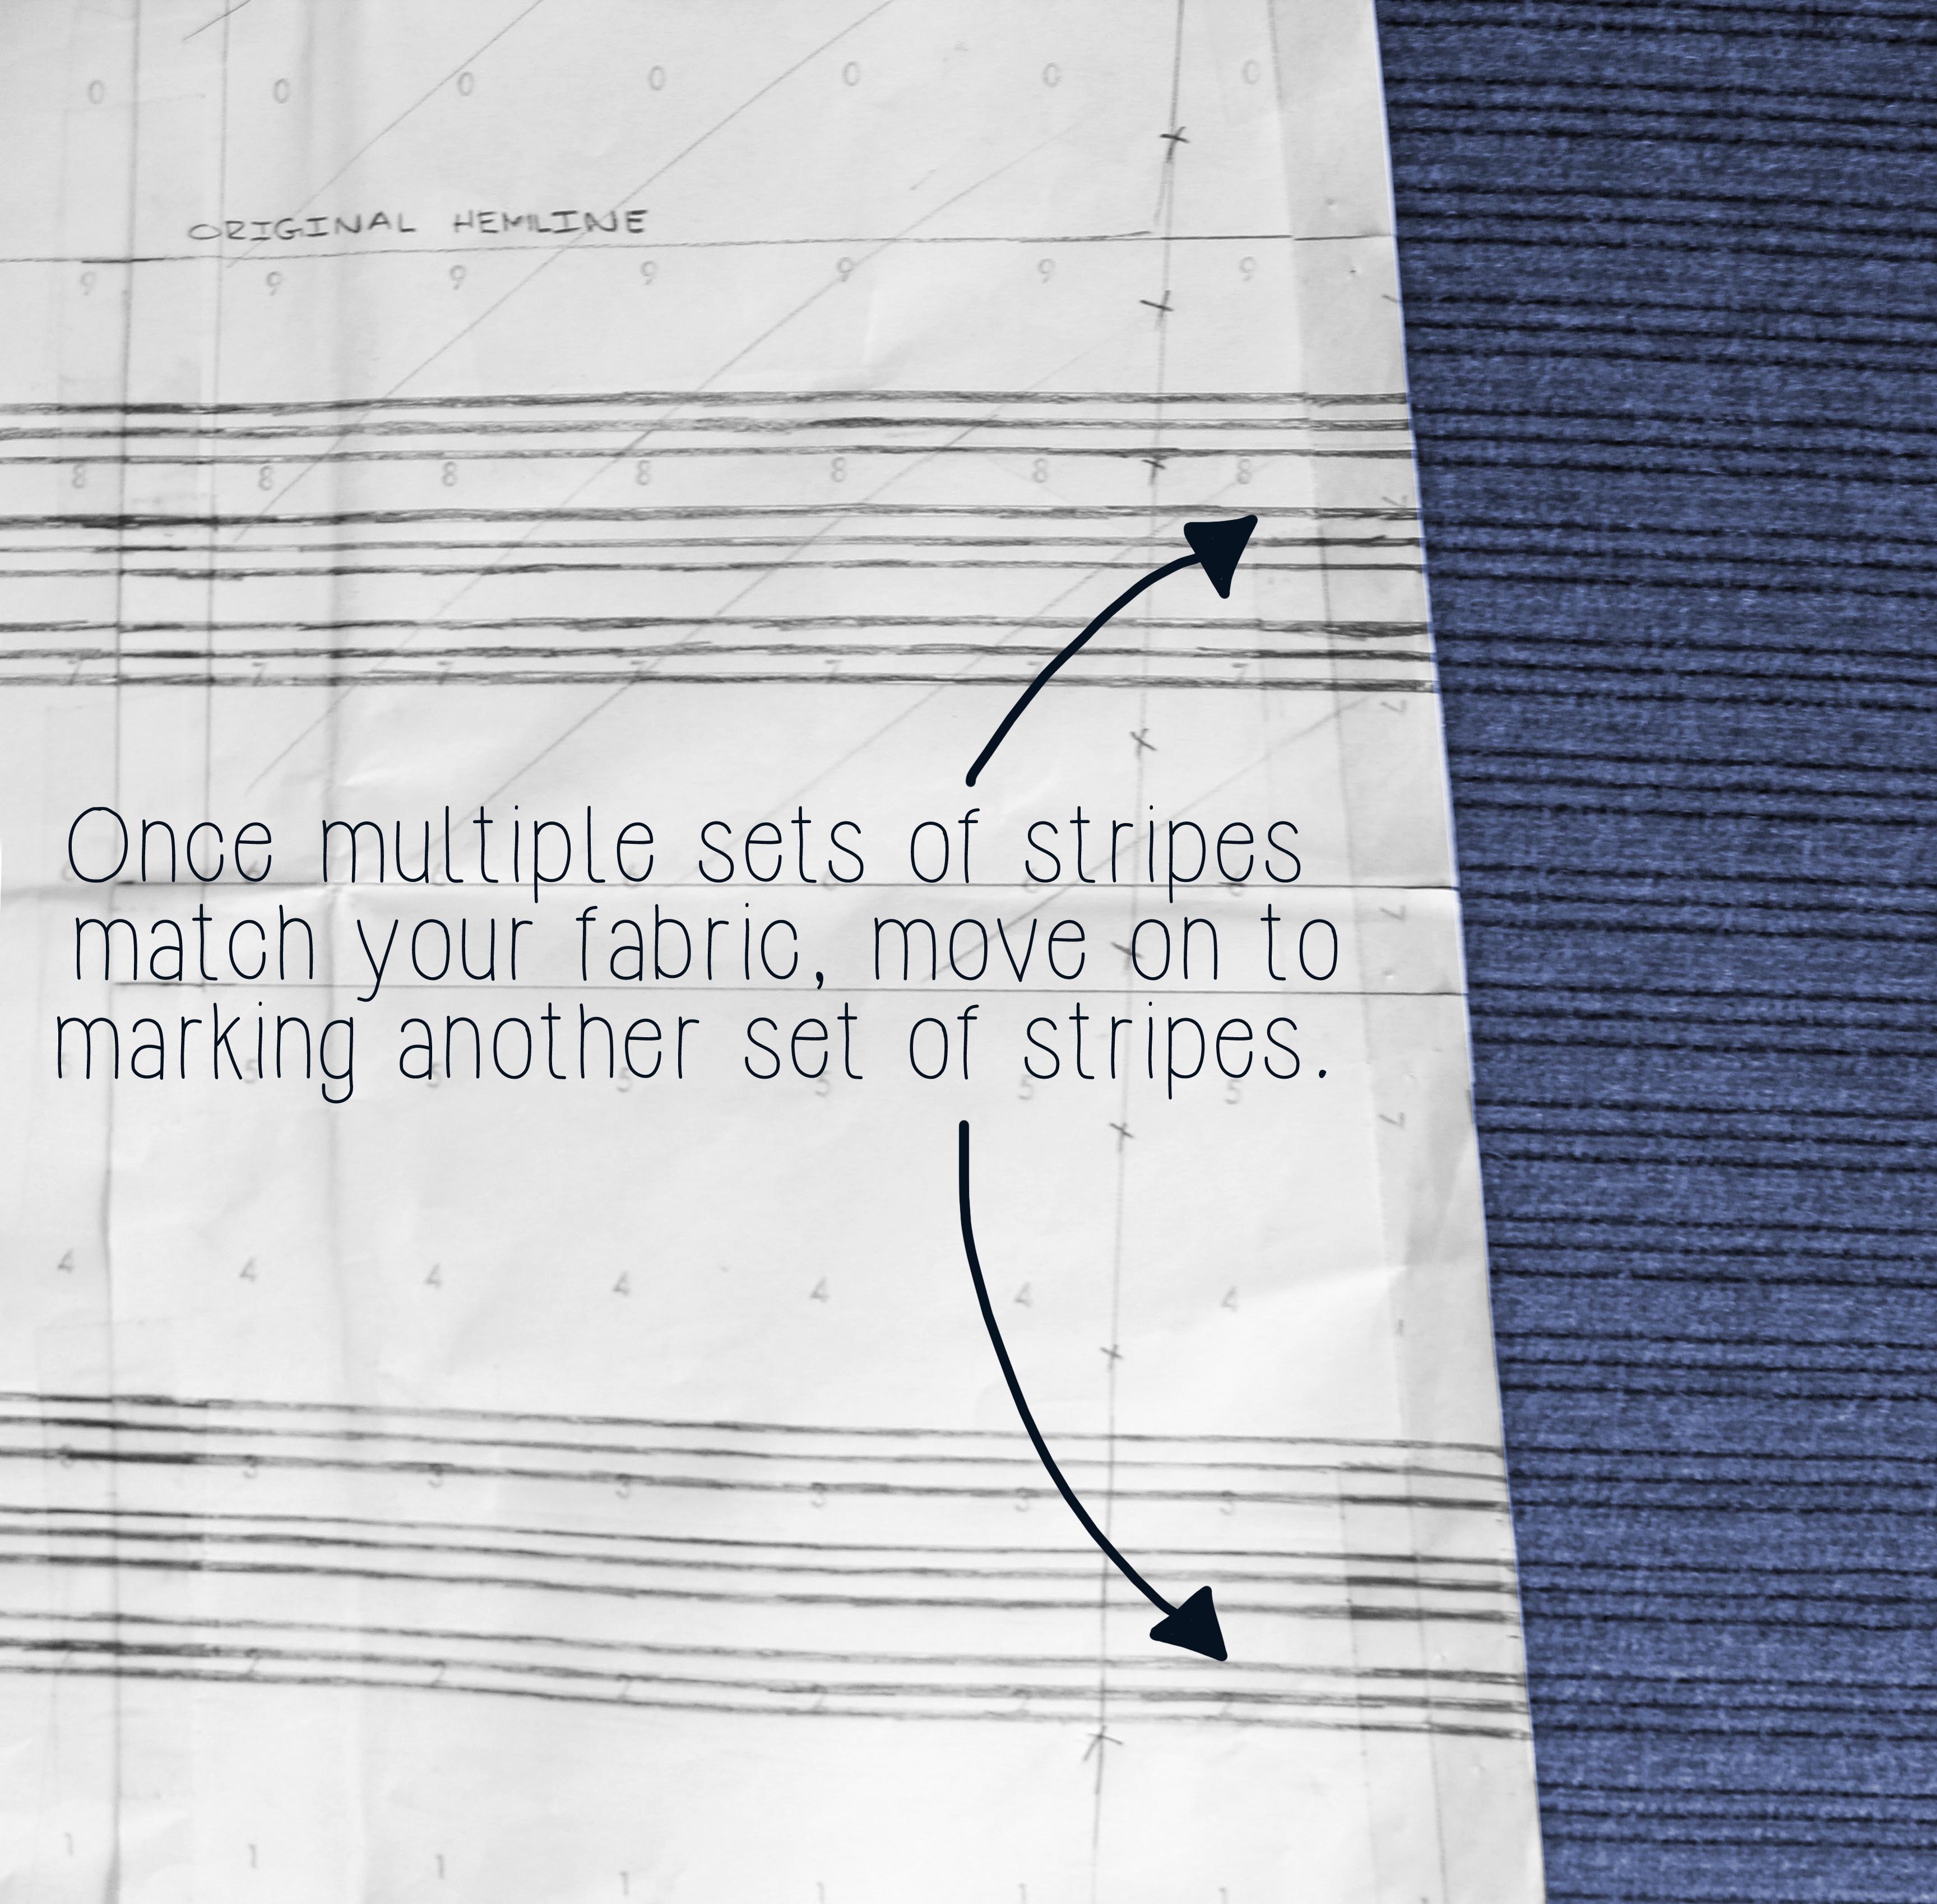
If you are more familiar with sewing stripes, then you probably would only need to draw a few sets of 2-3 stripes. Think: 2-3 Sets of stripes near the neckline, 2-3 sets near the waist, 2-3 near the hem.
Once all of these individual stripes match, then you should be good to move on to the next step. I always seem to have problems matching my notches and keeping my seam allowances even, so I prefer to draw quite a few sets of strips.
It takes less time than having to recut the entire dress, or having the stripes come out unevenly and having to redo everything. There are no short cuts in sewing, unfortunately! But the choice is yours, you do you.
How to sew with stripes sewing tutorial: Step 4
Alright, this is where things get tricky.
Now, we need to make sure that the stripes on the pieces being sewn to the first marked up pattern piece match. (That's a mouthful, am I right?)

Let's take it piece by piece. With the Dany, I chose to mark up the center front panel first.
Now, I need to make sure that the stripes on both the left and right side panels match those on the center front panel.

Please don't copy the stripes from the left panel to the right.. Just do each one on its own. (No one likes hand me downs from their older sister.)
With this sewing tutorial, I chose to mark up the left side panel first. Match up the seam line that connects the left side to the center. (NOTE: Match up the actual SEAM LINE, not the seam allowance.)
Notch the stripes on the new pattern piece, and draw on the finished stripe. Repeat steps 2 & 3 for this new pattern piece. With the Dany, I also repeated the same process for the right side panel.

NOTE: Before marking your stripes in marker, I would make sure and walk your seams. "Walking your seams" simply refers to placing connecting pattern pieces right side to right side, and walking the seam. This is just another way to ensure that everything matches properly. 
How to sew with stripes sewing tutorial: Step 5
Now we need to repeat the process for the backside of the garment.
It can be a bit dangerous starting fresh and following the same exact process for the back as we did for the front.. So we are going to match the stripes of the back side panels to the stripes of the front side panels.
As before, match up the seam lines, and notch the individual stripes. Then proceed to draw the stripes on the side panels, to match up with the center back panel.

NOTE: The process may be slightly different if your own personal project is not a princess seam dress. But the process is essentially the same, ensuring that all stripes match. You are simply working from one panel to the next, all around the garment, until you have a finished piece with all connecting stripes matching.
How to sew with stripes sewing tutorial: Step 6
At this point, the pattern pieces should be completely marked up with stripes.
I would walk all of the seams one more time (just to double check that everything matches!) before pinning and cutting everything out.

I think this is a pretty familiar saying in the sewing community: "Measure twice, cut once." It's always good to double check measurements, particularly when sewing with stripes.
I'm pretty sure I walked my seams like 10 times before cutting this beauty out. Always leave it to me to pick out the most difficult fabric, with the tiniest stripes ever. #psycho
How to sew with stripes sewing tutorial: Step 7
Once everything matches up properly, it's time to pin and cut your pattern pieces out.
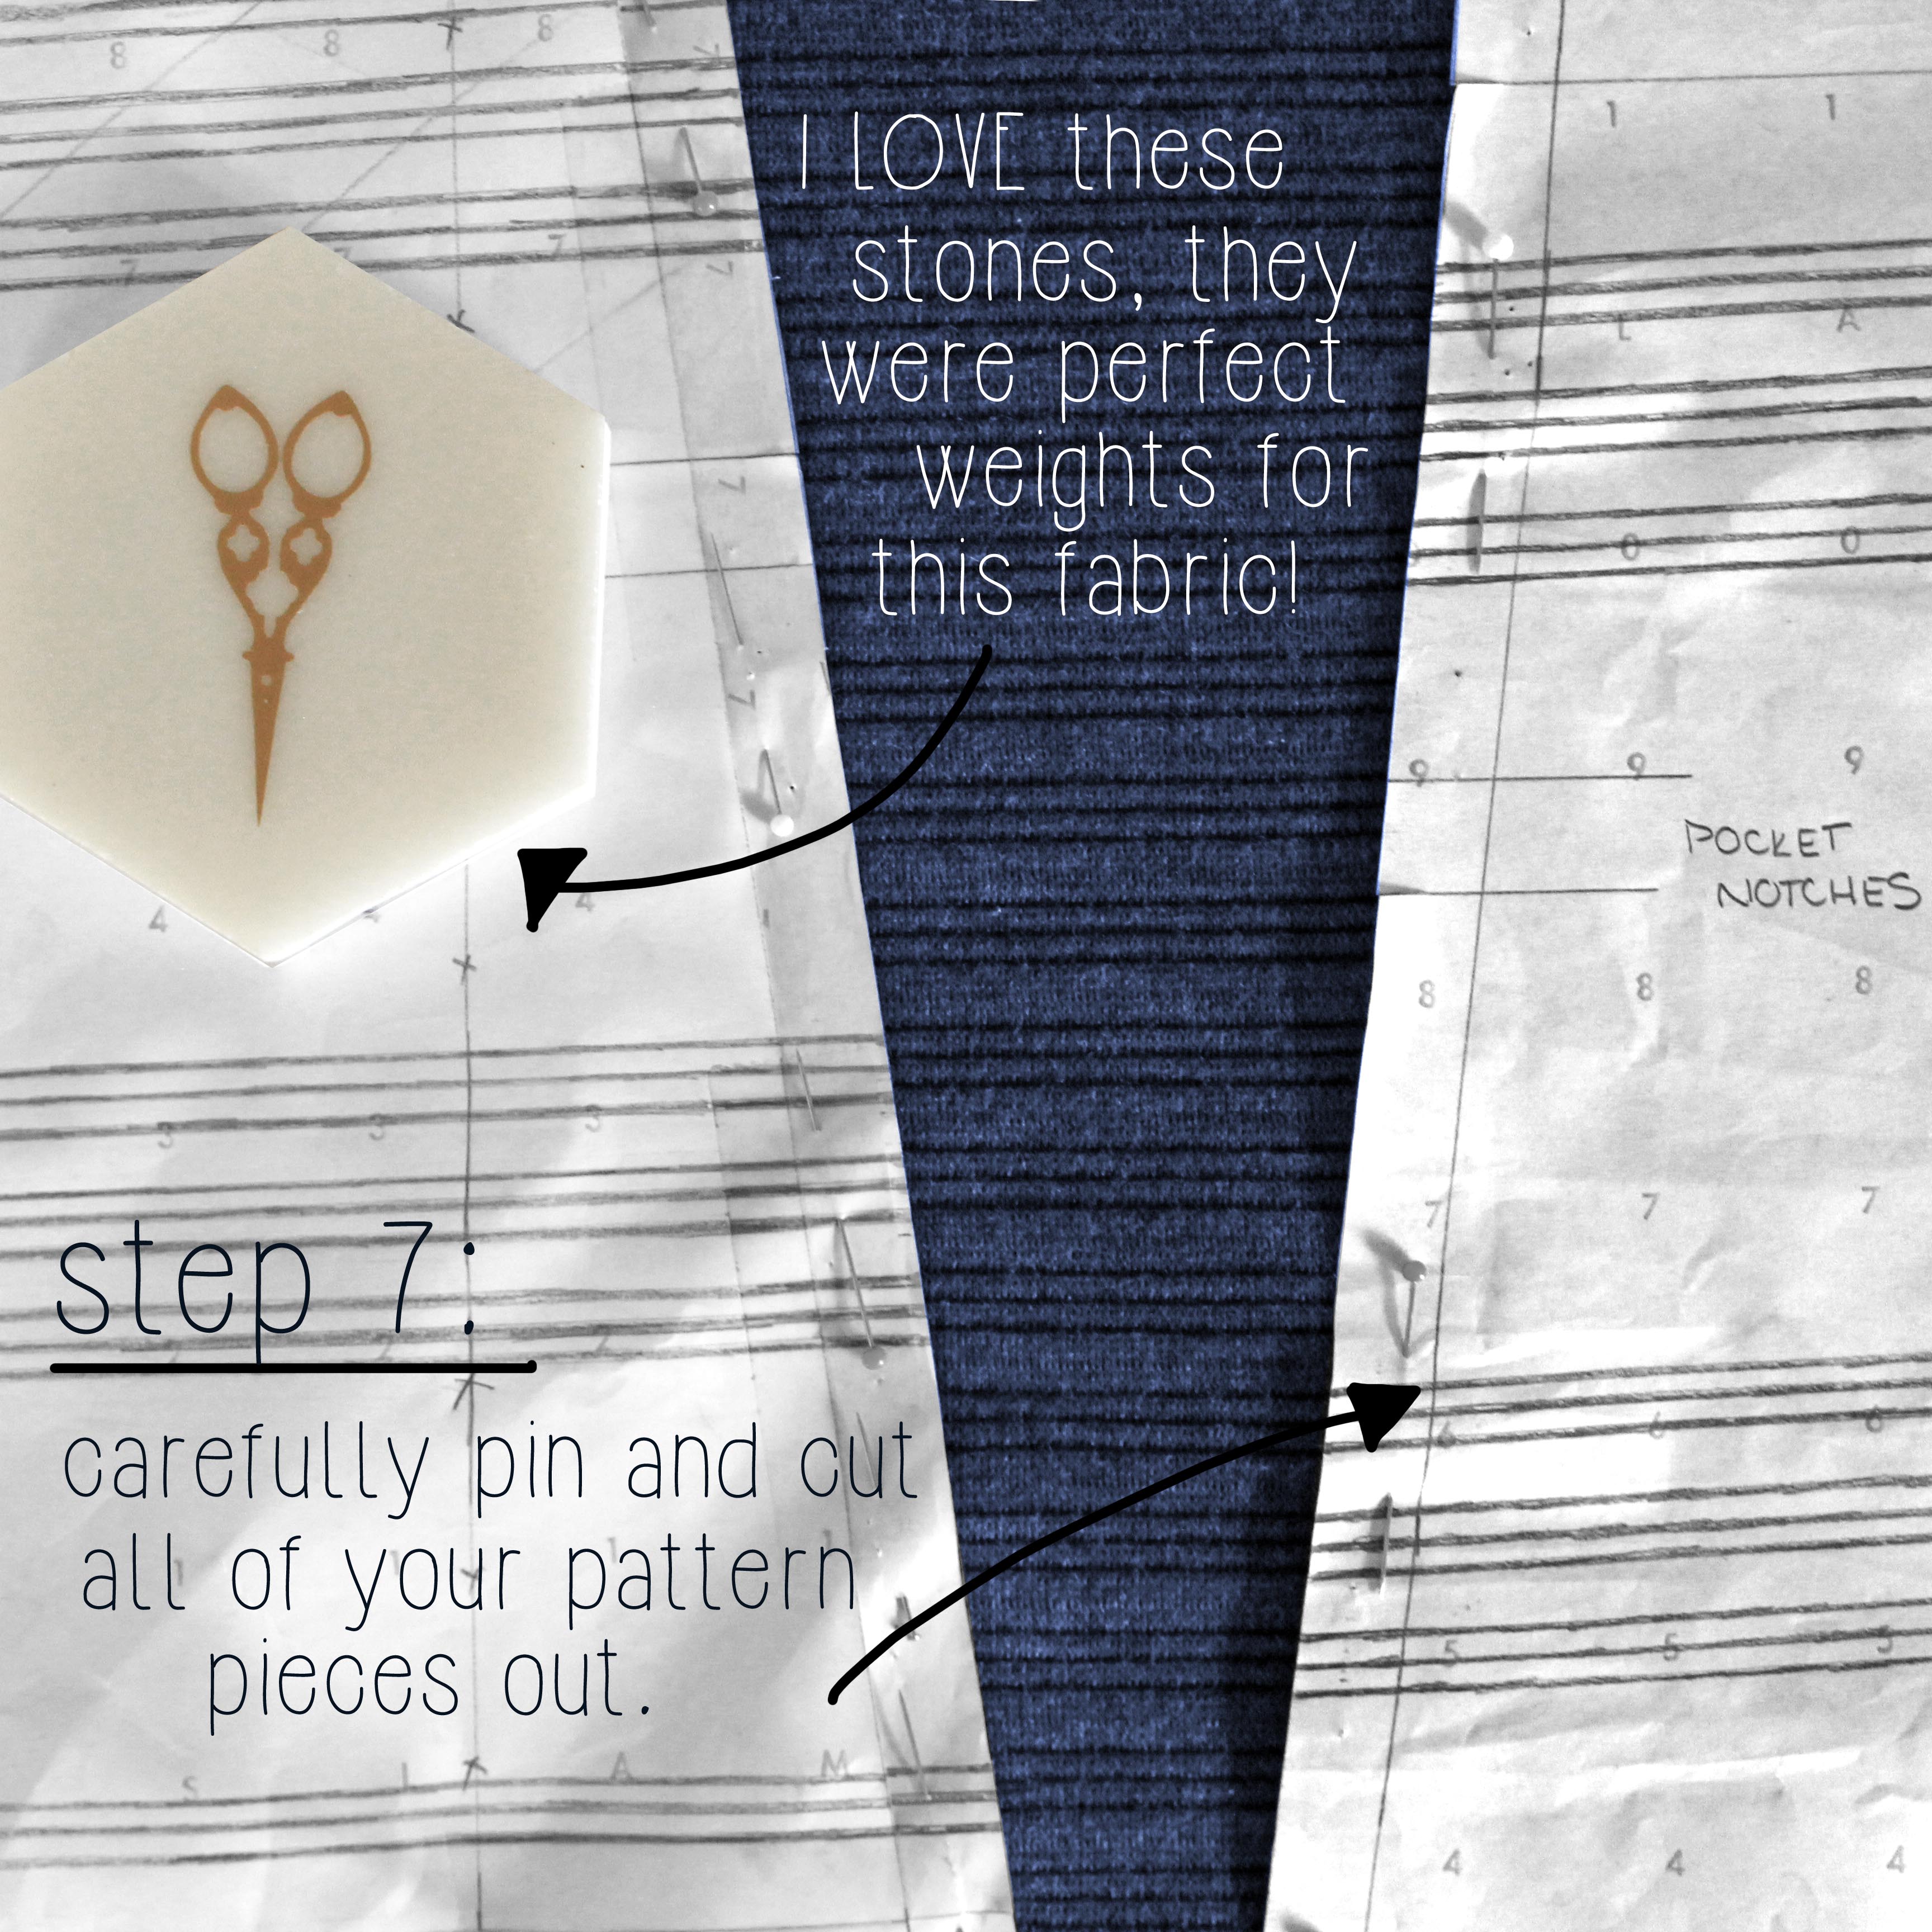

When cutting, make sure to notch every. single. stripe. that you have drawn on your pattern pieces. This ensures that you have a guideline when sewing up your stripes, and gives you the BEST possible chance of matching every one up.
This is especially important when sewing with striped knits (like with the Dany) because knits can often stretch during sewing.
Notches are literally your BFFL when it comes to sewing stripes. Match them as you pin and sew your piece up, and you should have a beautiful garment in which the stripes all match.
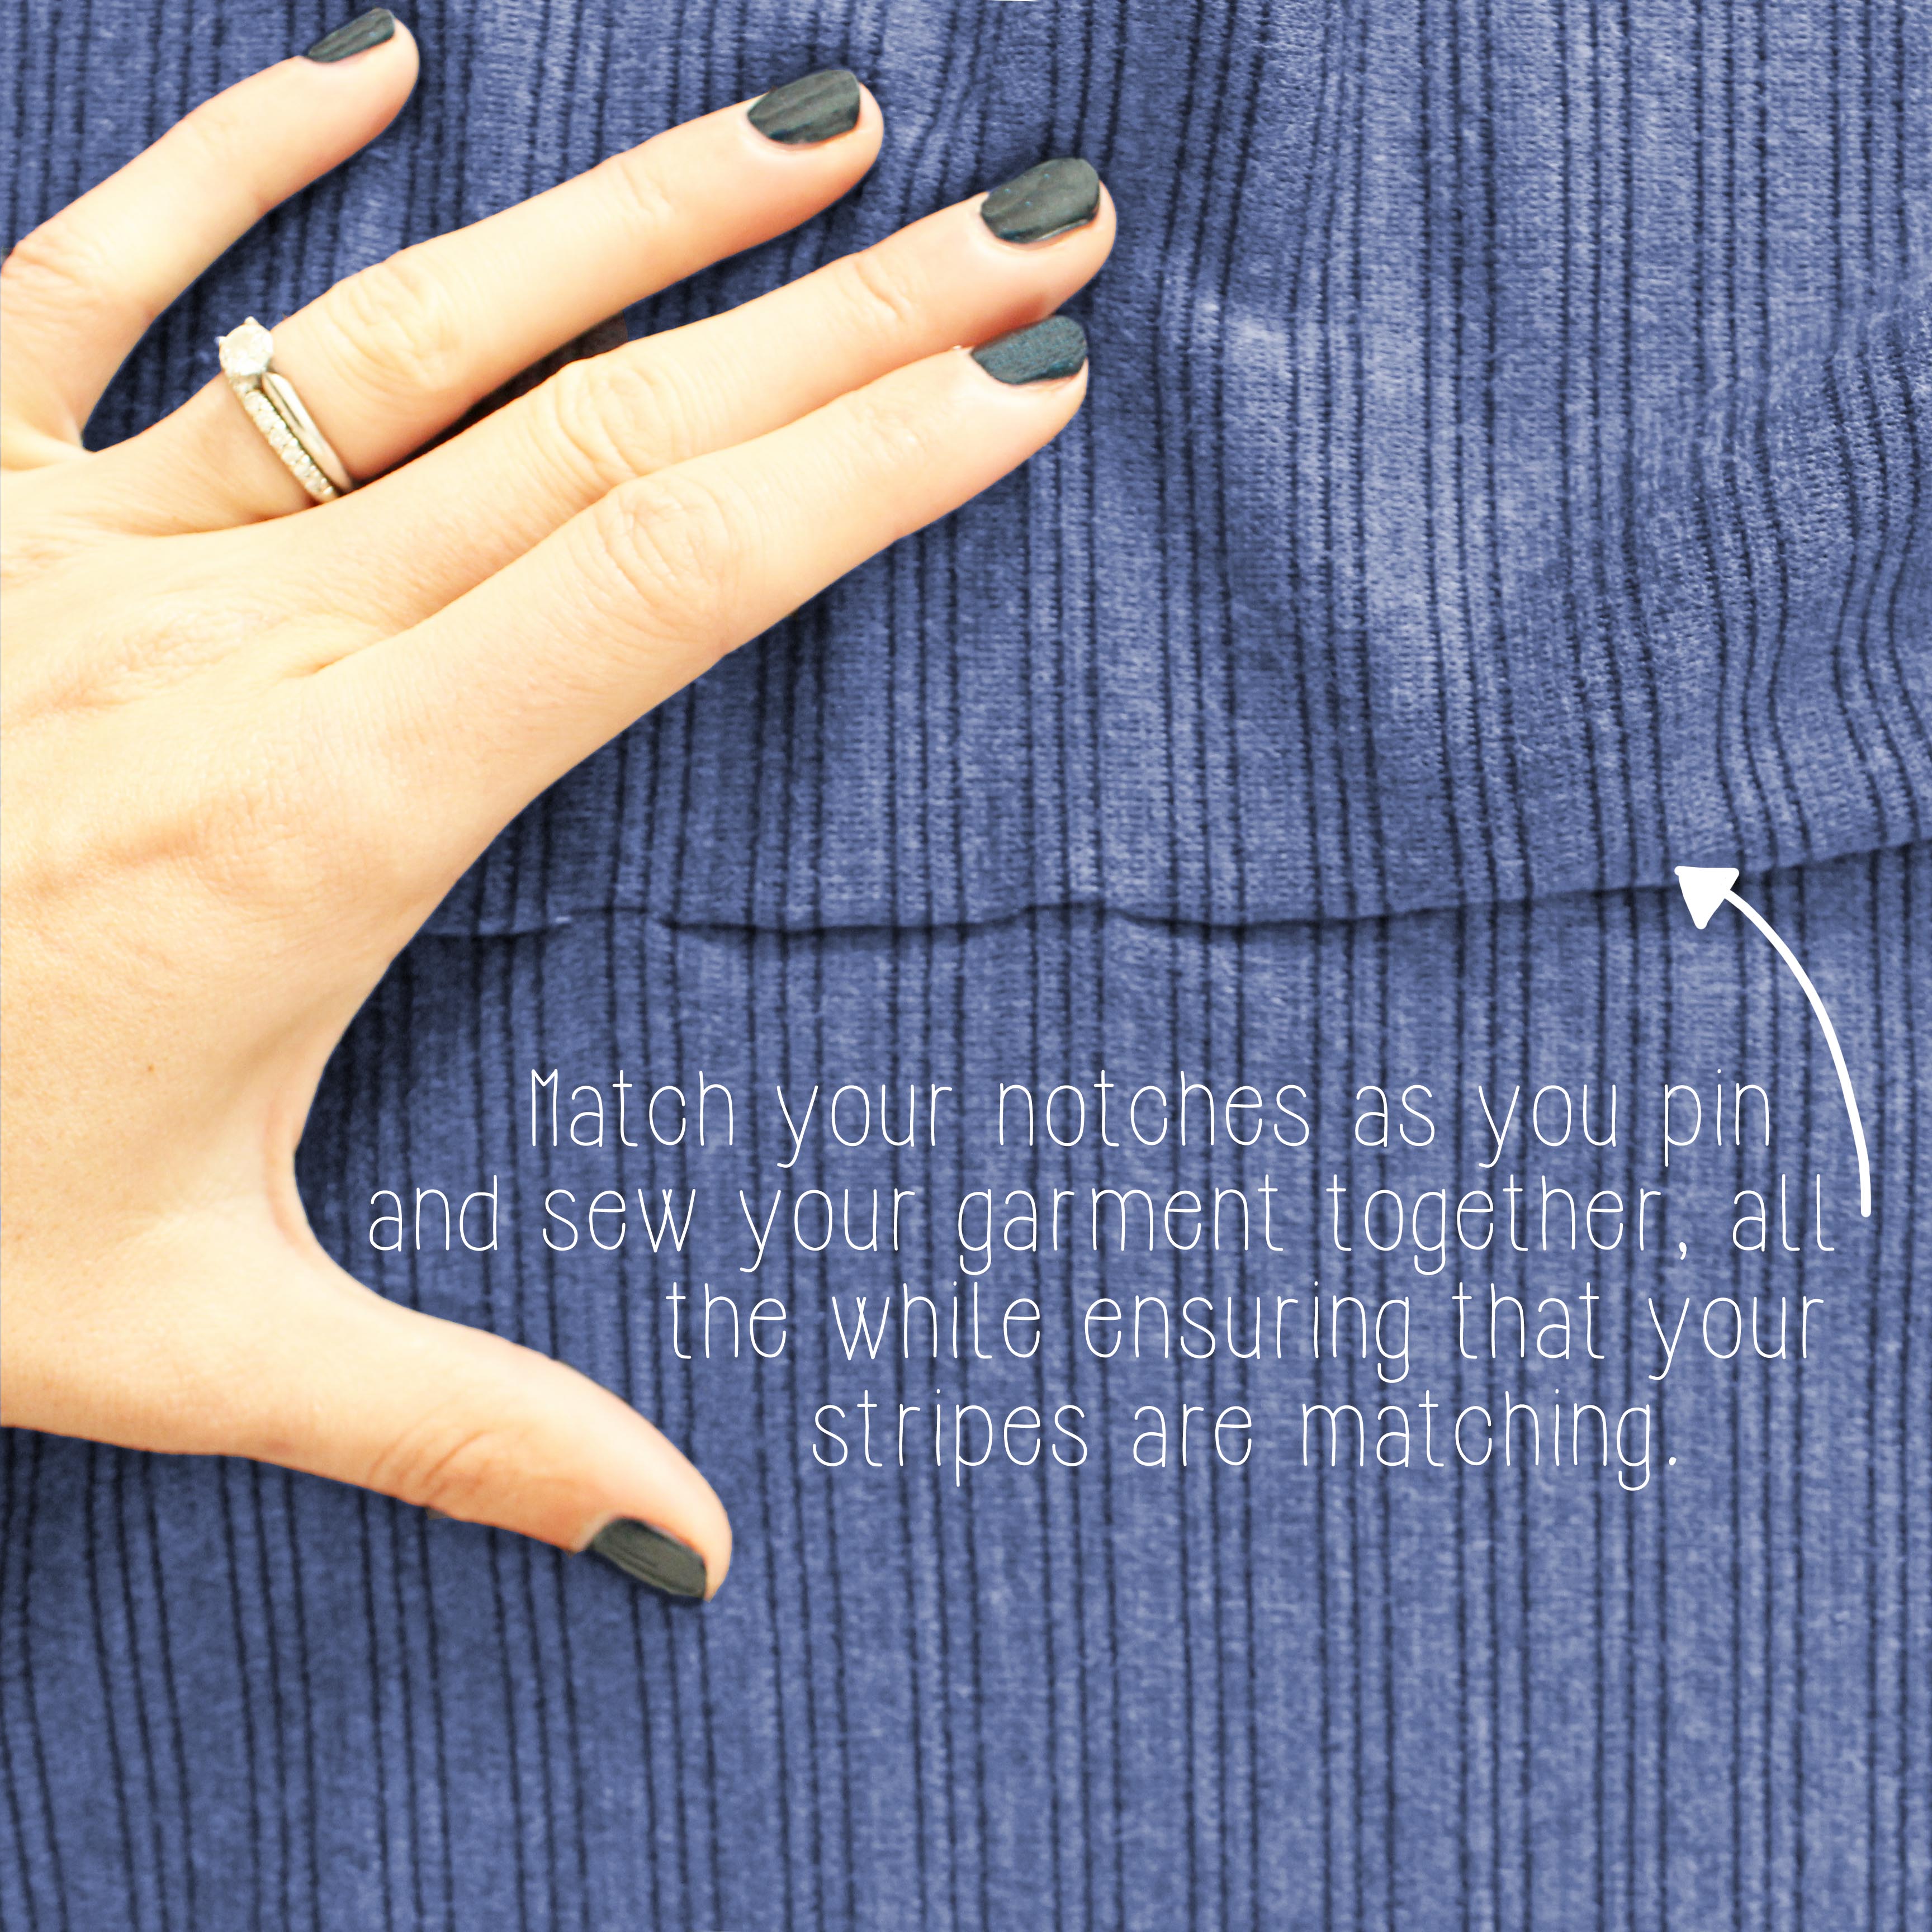

Sewing stripes really doesn't have so much to do with technical knowledge as it does with patience and attention to detail. Even having a measurement off by an 1/8th of an inch can mess up the entirety of your garment.. So it's imperative to take the time to get your measurements right.
I remember the first time at FIDM when a teacher pointed out stripes sewn properly (i.e. Matching) and stripes that were sewn unevenly, and were completely off.. It's not something you KNOW to look for, until you know to look for it.
Once you see it, you'll never be able to unsee it.

It's actually a pretty good way to tell if the garment you are buying is a quality piece or not.. Anyone that truly cares about their craft and in producing a quality garment will ensure that stripes are matched properly.
And those that don't care.. Well, they don't care. So why should you?
Do you have any projects that you've been wanting to sew up in a striped fabric? I'd LOVE to see what you're working on.. Stripes are my jam, don't you know.
(Don't forget to grab your downloadable tutorial on how to sew with stripes.. The perfect at home sewing companion!) 

