A Step-By-Step Sewing Machine Review: Brother 1034D Serger

Sewing machines are a girl's best friend, right? Earlier this year I went into some detail on my most valuable tool as a seamstress: My Janome DC2010 sewing machine. This week I will be walking you through a second step-by-step sewing machine review on the other love of my love: My Brother 1034D serger.
Not only will I be telling you ALL about this beauty (and why it's 100% a worthy investment) but I will also walk you through how to thread a serger. Because it's definitely not easy, and it definitely takes practice.
And no--I'm not getting paid to write this review, or being sponsored by Brother. I simply love my Brother 1034D serger, and wanted to share one of my most valuable tools with you guys. But first.. What IS a serger?

Sewing machines can be used for pretty much anything and everything when it comes to sewing. Think: Sewing seams, decorative stitches, buttonholes, and even finishing off raw edges of seams.
On the other hand, sergers (like my Brother 1034D serger) are used solely for the purpose of finishing off the raw edges of seams.
So. If a regular sewing machine could be used to finish off a raw edge, then why buy a serger? The short answer: Sergers finish off a seam MUCH, MUCH CLEANER than a regular sewing machine ever could. A serger simply provides a cleaner, professional, and overall more secure finish.
(Ready to up your sewing game? Don't forget about building up a good sewing kit first. Grab your complete beginner's guide & shopping list below!) 

While regular sewing machines only have 1 thread for sewing, sergers typically have 3-4 threads. This not only allows for a more secure finish, but the additional threads encapsulate the raw, frayed edge much more than a single thread stitch on a regular sewing machine ever could.
And while the idea of encapsulating more threads might not seem worth it to invest in a serger (not necessarily my Brother 1034D serger, but any machine) I promise you that it is the perfect reason to invest in one.
The instant most fabric is cut, it starts to unravel. (With the exception of heavy fabrics, like felt.) But, for the most part, keeping fabric from unraveling during the sewing process is a real issue. Not securely closing off that raw edge not only looks unprofessional, but will result in the fabric continuing to unravel over time.
Any semi-experienced seamstress can take one look at a seam finished off with a serger and a seam finished off with a regular sewing machine and know the difference.

And honestly, who wants to wear clothing that actually LOOKS homemade? #notme
(Ready to up your sewing game? Don't forget about building up a good sewing kit first. Grab your complete beginner's guide & shopping list below!) 

I have mentioned before in previous posts that one of my very favorite questions to be asked is "Where did you get that dress?" There is something so rewarding in the fact that something you made with your own two hands could be seen as having been purchased from a store..
And something not so rewarding when people are able to tell that what you are wearing was homemade. So why not do everything in your power to make the best possible clothing you can?
That not only includes what can be seen from the outside, but also what is on the inside. Arguably, what is on the inside is more important, really.
Okay, so you're down with the idea of getting a serger now, right? Sergers can be pretty intimidating to look at (especially the Brother 1034D serger) so let's walk through EXACTLY what goes into one.
(Ready to up your sewing game? Don't forget about building up a good sewing kit first. Grab your complete beginner's guide & shopping list below!) 
Sewing machine review: Brother 1034D serger
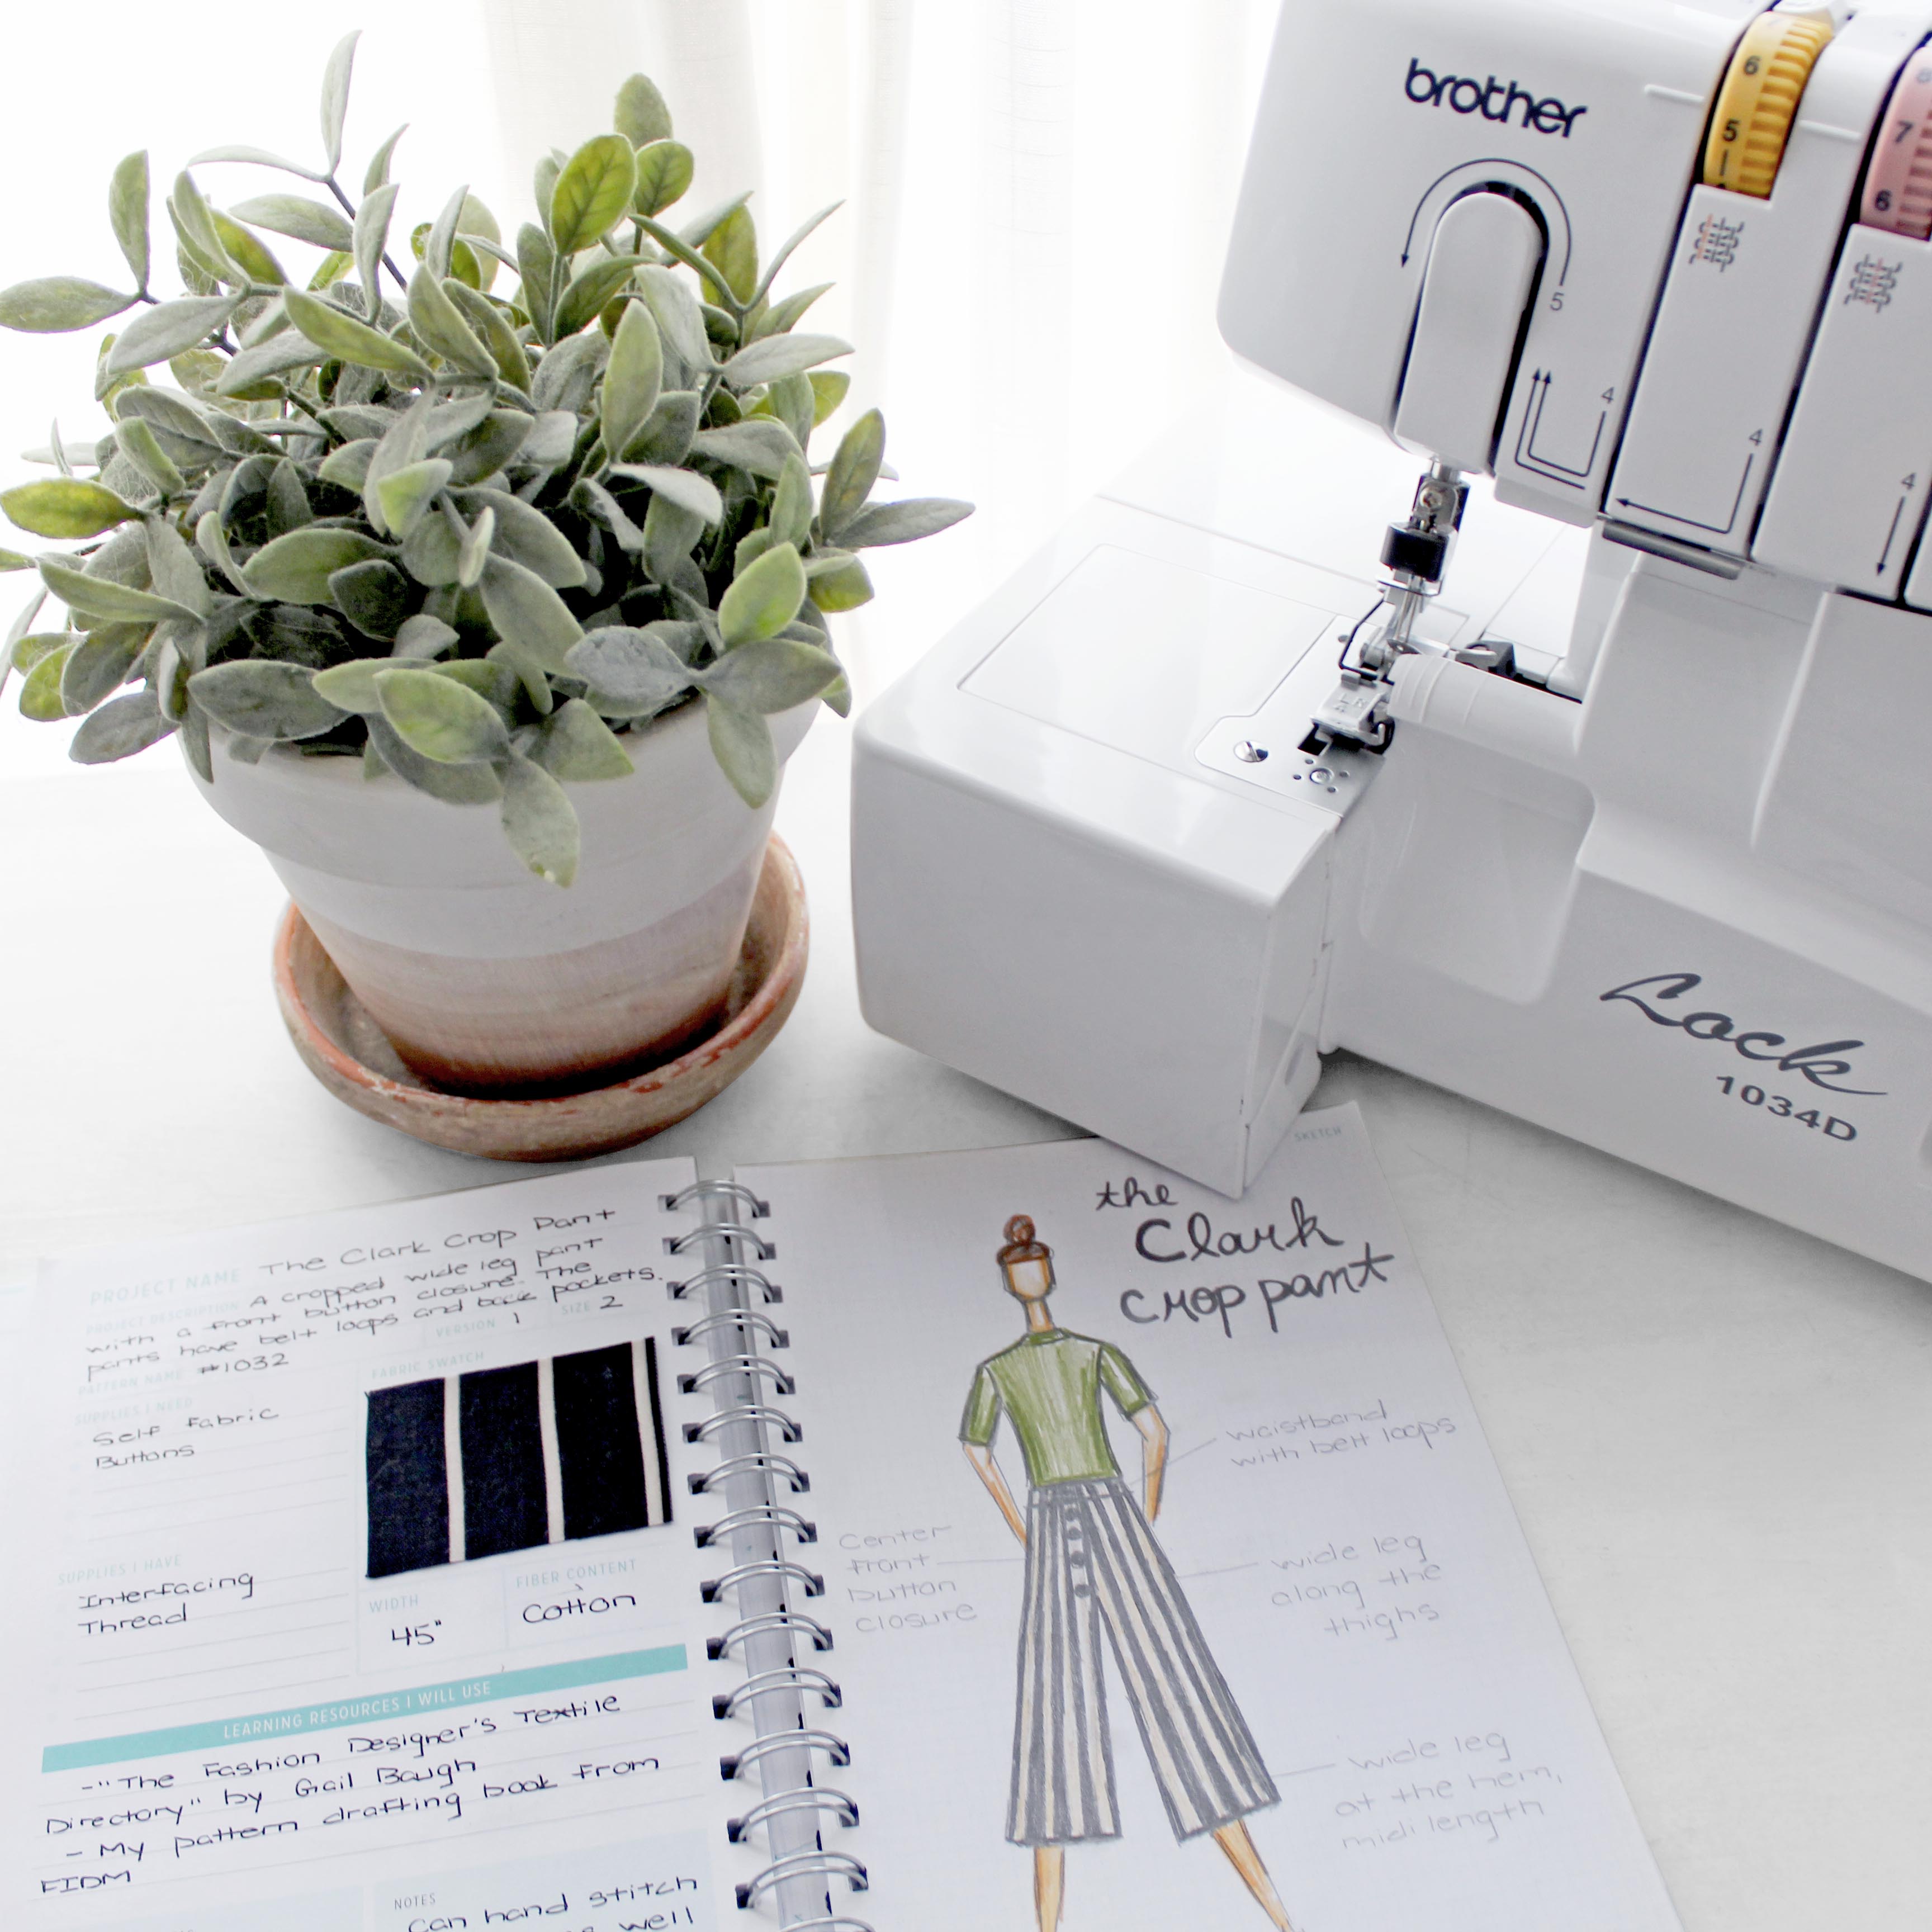
Looking at the Brother 1034D serger, you can see that this is a 4 thread machine. There are 4 cones of thread, and 2 sewing needles. BTW: Always use CONES of thread when working with a serger, rather than SPOOLS of thread. Sergers eat up a lot of thread, so it really isn't worth it to use basic spools of thread.
I only work with black & white cones of thread with my serger. If I bought matching cones of thread for every single project I create.. My tiny house would literally be filled with thread.
Black typically works just fine to encase the seams of dark colored fabric, and white usually works perfectly for lighter colored fabrics. But if you have the space (& the funds) to purchase 4 matching cones of fabric for each project..

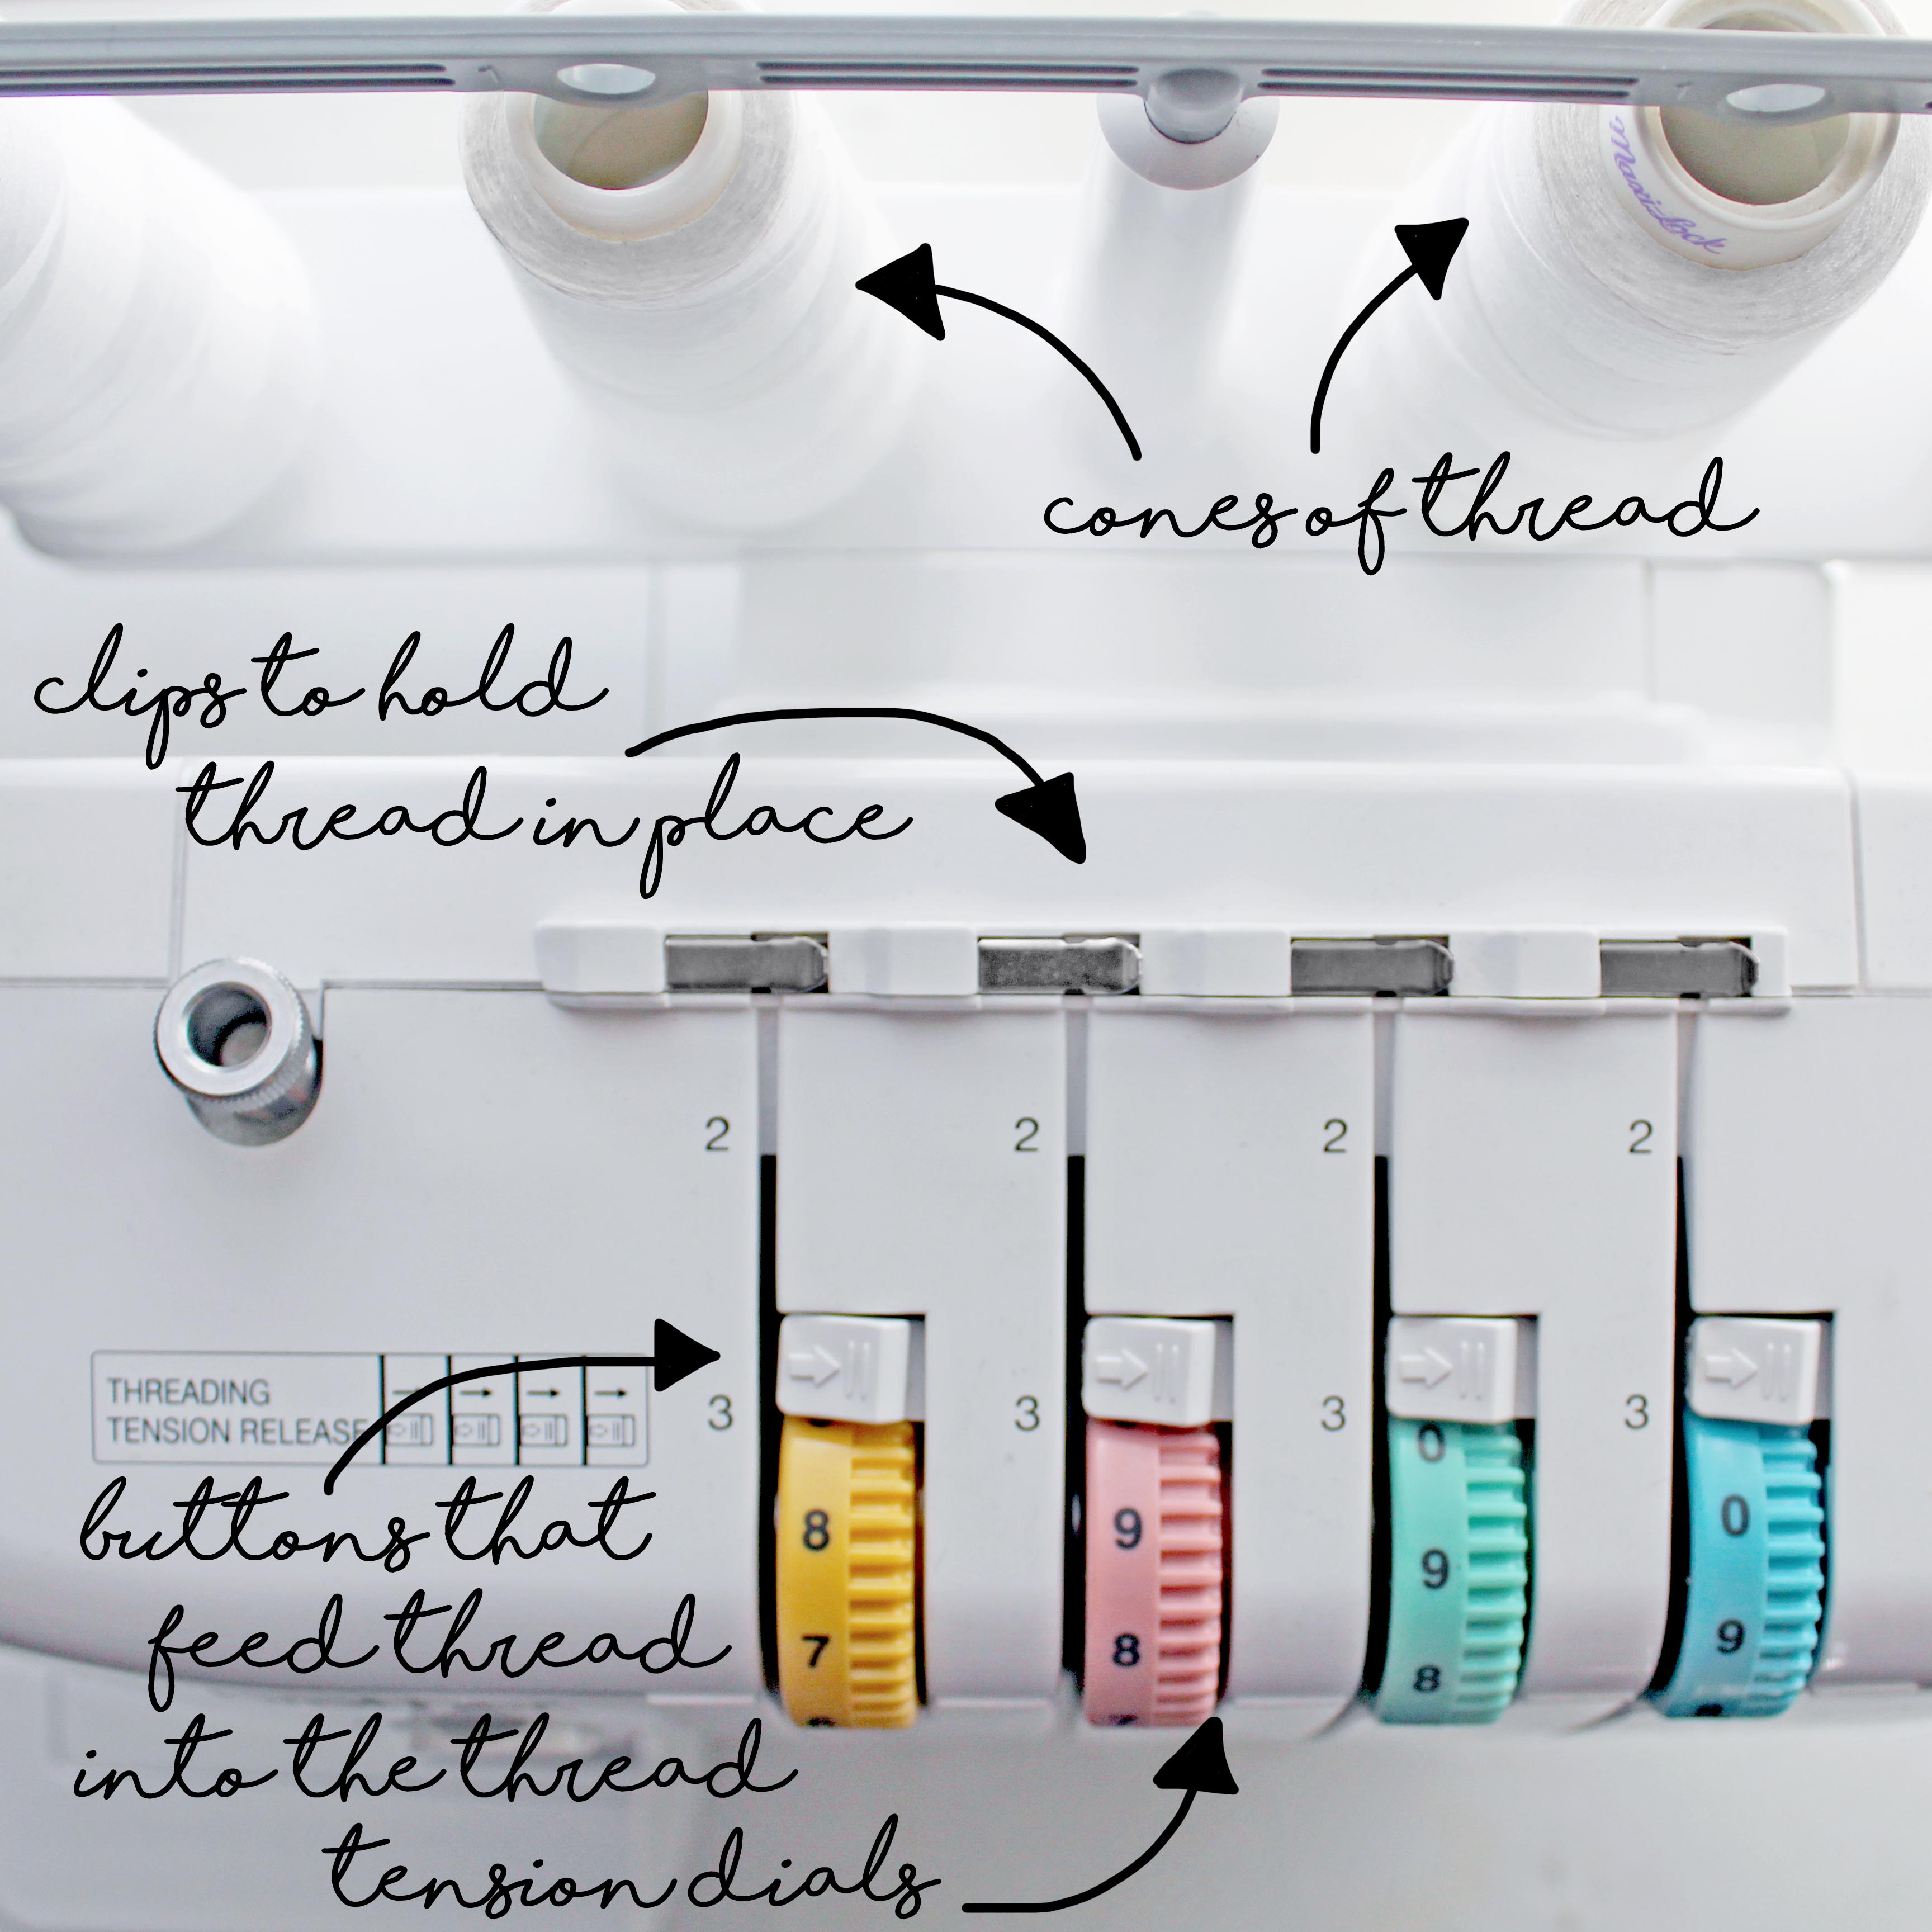
Moving on from the cones of thread, the little metal clips (i.e. step 2 when threading the machine) helps to keep the thread in place as it is fed into the tension dials (i.e. step 3 when threading). All of the thread tension dials are color coded according to which thread they are used for.
The color coding is INCREDIBLY helpful if there is an issue with the finished stitch. If one thread is too tight, simply determine which one it is (according to the little diagrams on the front of the machine) and adjust the tension dial accordingly. SO much easier than trying to figure out what the issue is by trial and error.
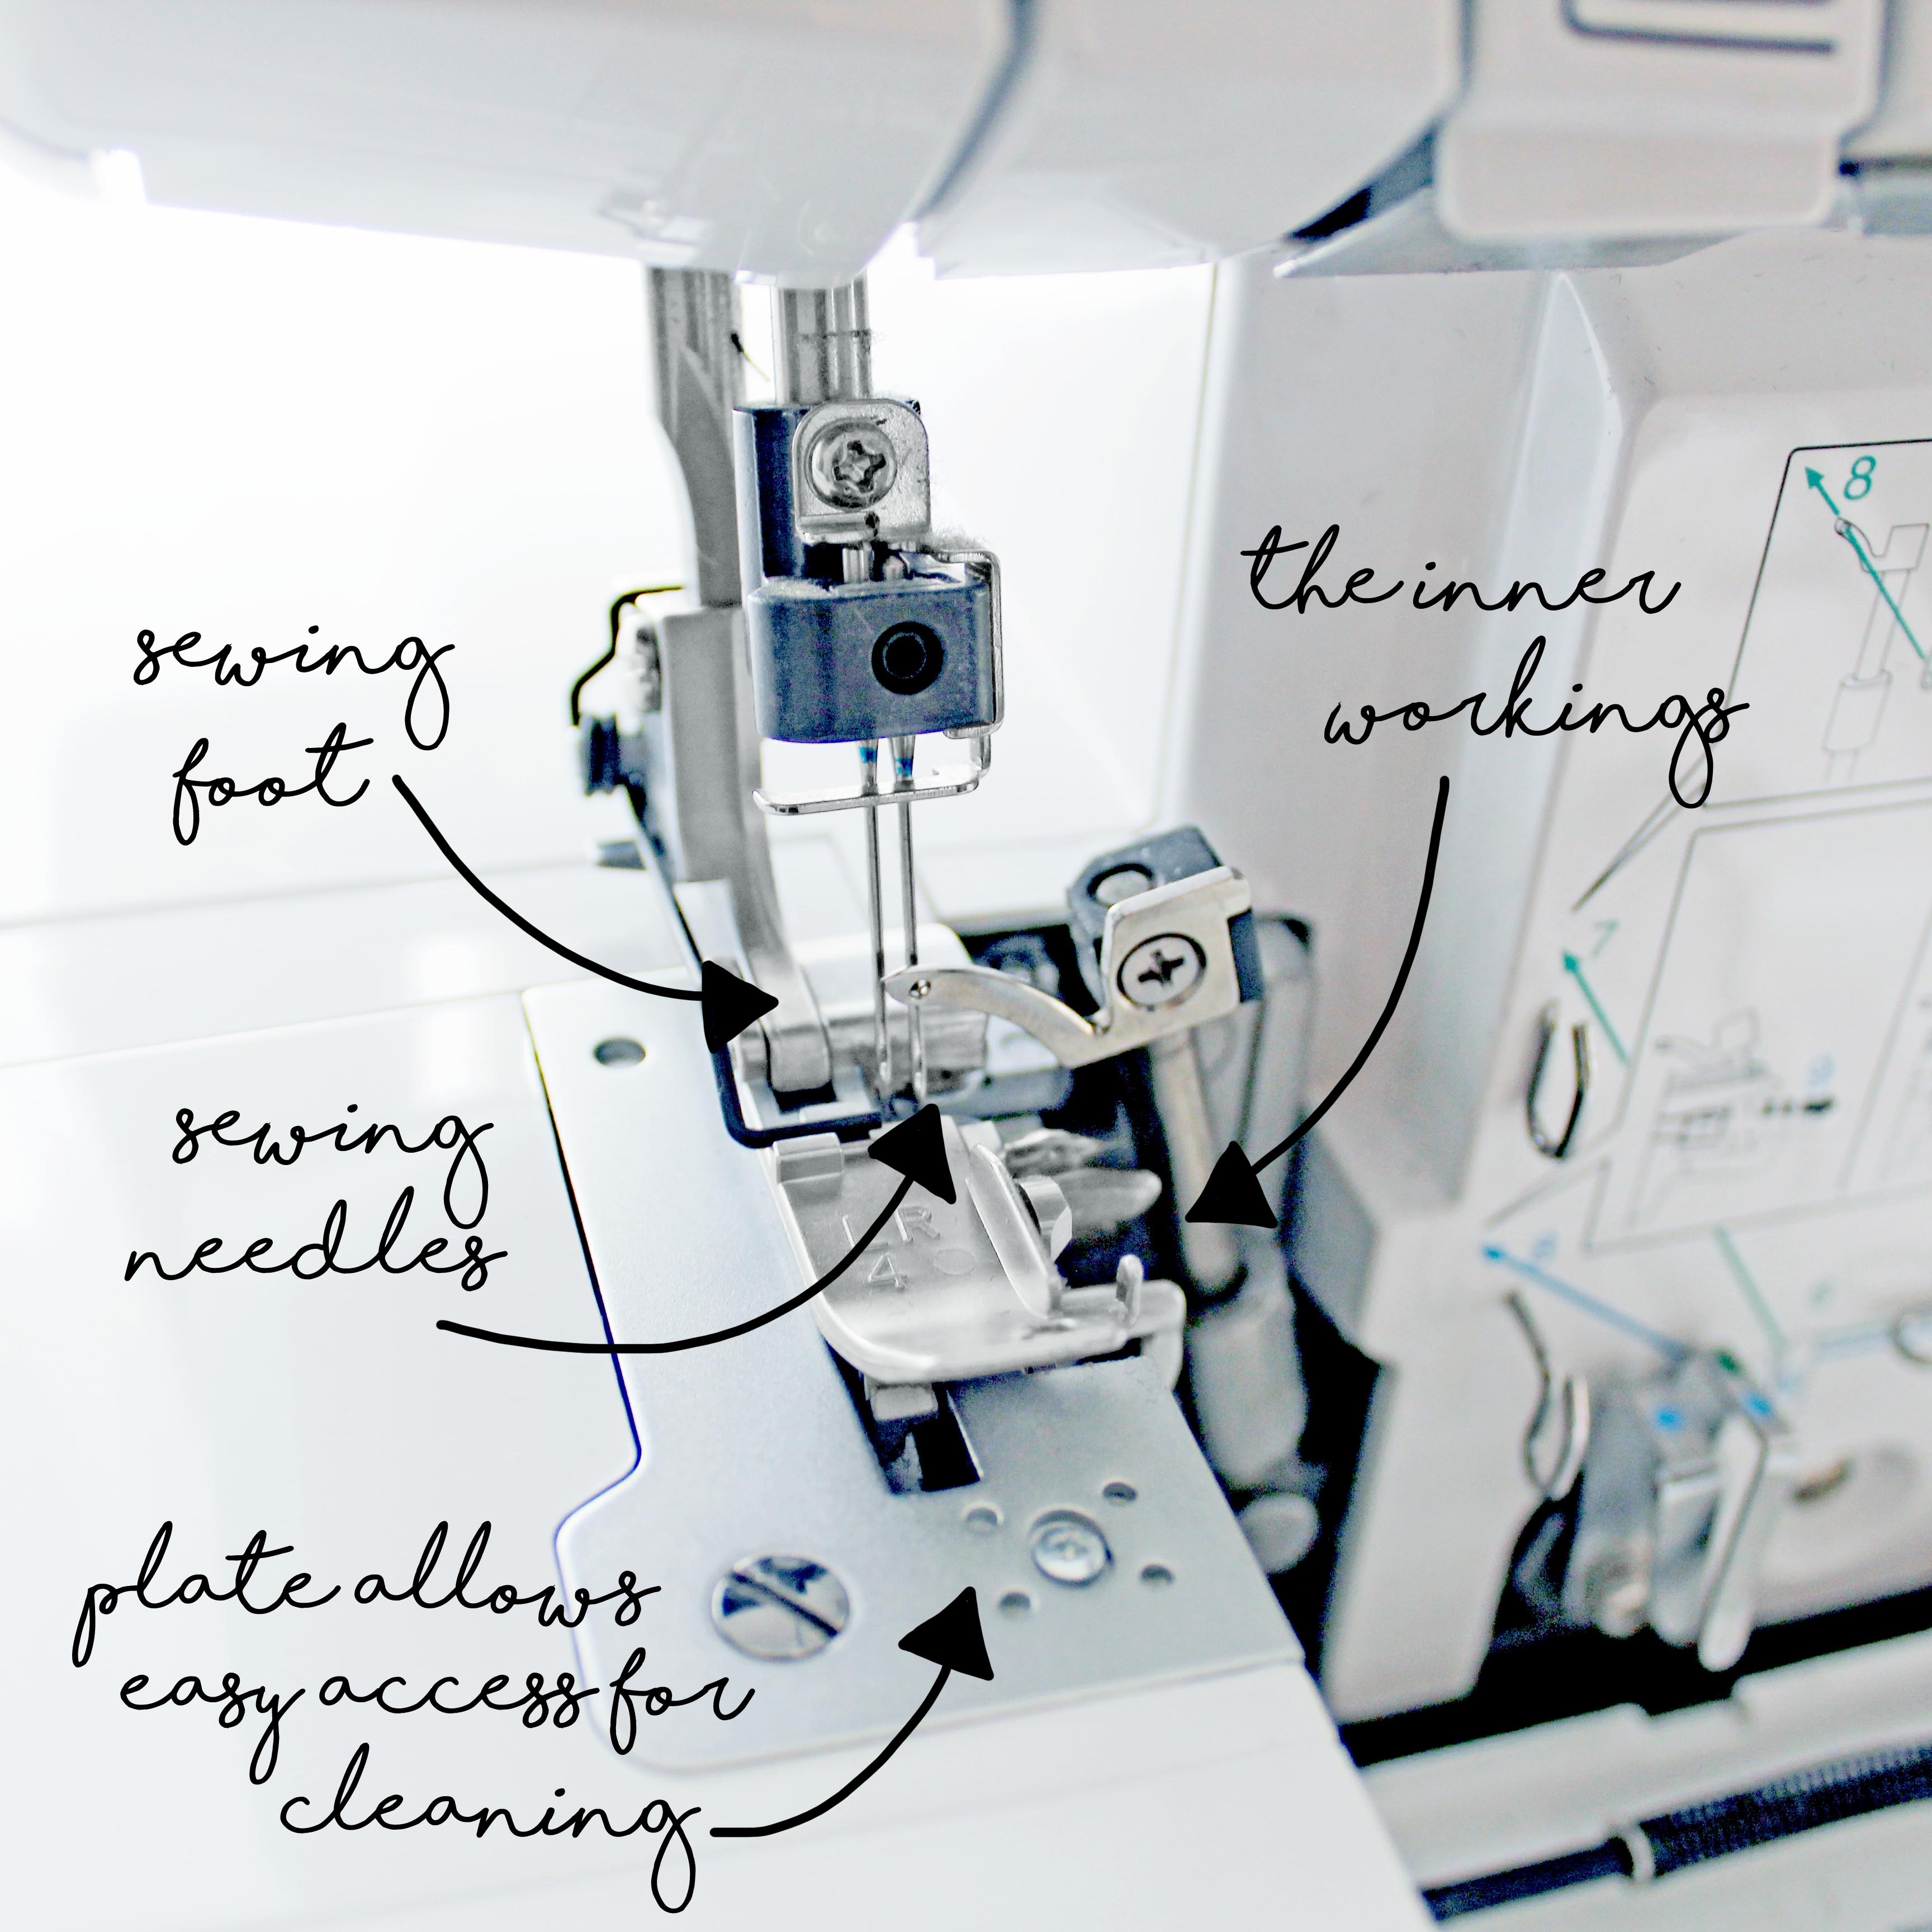
Moving on to the front of the machine, the sewing needles & sewing foot are slightly to the left. There is a screw in the plate underneath the foot which allows for easy access to clean inside the machine. (Don't fret--We will be going over the inner workings when we go over how to thread the machine.)
(Ready to up your sewing game? Don't forget about building up a good sewing kit first. Grab your complete beginner's guide & shopping list below!) 
On the left hand side of the serger there are a few different knobs & adjustments.
The setting furthest to the right is for the stitch width. As the diagram shows, switch on the "R" setting for a tighter stitch, and #7 for a looser stitch. I keep mine at #5, which works well for pretty much everything I have ever sewn with my Brother 1034D serger.
The little switch at the bottom of the serger is to adjust the position of the cutting knife. I always keep mine flipped to the right, and have never needed to adjust it. Ever.
The knob to the left is for adjusting the stitch length. As with the other knob, move the dial to the left for a tighter stitch and to the right for a looser stitch. I keep mine right in the middle at #3, which has worked perfectly for all of my sewing projects.
The final little adjustment on this side of the serger is the "differential feed ratio adjustment lever".

Apparently it's supposed to help with stitch quality, depending on the type of fabric you're working with.
But I've never adjusted it, and all of my projects have turned out just fine.


Moving to the back of the sewing machine, there isn't a whole lot going on there, with the exception of the serial number.
On the right hand side of the sewing machine is the lever for raising & lowering the sewing foot. Also, the knob for raising & lowering the sewing needles is below that. Plug the serger in, turn it on, and you're ready to start sewing!
(Ready to up your sewing game? Don't forget about building up a good sewing kit first. Grab your complete beginner's guide & shopping list below!) 
Sewing machine review: How to thread a serger

Now it's time for the oh so difficult task of how to thread a serger.
While yes, sergers are pretty meticulous to thread, I feel like the Brother 1034D serger is one of the easier ones to figure out. There are numbered steps all along the machine, as well as the color coded knobs & thread diagrams.
It's a bit overwhelming to look at all at once, but taken step by step, one thread at a time.. It's really not too bad.
How to thread a serger: Step 1

I always start with threading the machine from left to right.
Insert the thread cone into its plastic setting, and thread through the hole directly above the cone of thread. (Make sure you have the big "T" pulled all the way up.) Right next to the hole is a little #1. Pull the thread and secure it under the little metal clip on top of the machine. There is a little #2 below the clip. Pulling the thread with your left hand, push the button next to the #3 to the right with your right hand. Pull the thread down, to secure it.
(Not sure if your thread is secure? Pull the thread up gently. If it pops out on top of the machine, it's not secure, and try again. But if it stays put, then you're set!)
Pull the thread down and to the left, following the little #4 arrow. Then bring it up around the horseshoe shape, following the #5 arrow. Keep pulling the thread down, slip it behind the little metal hook in front of the sewing needles, and thread the needle to the LEFT.
(Ready to up your sewing game? Don't forget about building up a good sewing kit first. Grab your complete beginner's guide & shopping list below!) 
How to thread a serger: Step 2

Next, we are essentially repeating the process for the thread second from the left.
Insert the thread cone onto its plastic setting and thread up through the #1 hole. Secure the thread under the #2 clip, through the #3 button, and thread to the left following the #4 arrows. Continue threading up through the #5 horseshoe, and bring back down to thread the needle to the RIGHT.
I think that in the Brother 1034D serger handbook it says that you are supposed to thread this needle first.. But I have always threaded the needles from left to right, and I've never had an issue.
But the choice is yours, you do you!
How to thread a serger: Step 3

Now this is where things start to get tricky. Continuing to move to the right, insert the thread cone onto its plastic setting. Repeat the steps of threading steps #1, #2, & #3. Pull the thread straight down, following the #4 arrow.
And THIS is yet another reason why I love my Brother 1034D serger. It has the instructions on how to thread this difficult part of the machine right there, front and center.
Because no matter how many times I have threaded this baby, I always forget how to do it when I need to rethread it. So for me, having these instructions printed right on the front of the machine really is perfect.
Continuing to pull the thread down, pull it towards the left when you reach the #5 little hook. Follow the green arrows and pull the thread under the first metal hook (labeled step #6 in green, with both the green & blue dots on it). Next, pull the thread up diagonally and through the little metal hook labeled #7, then thread through the horizontal needle. (The needle is depicted on the instructions as step #8 in green.)
And we have 3/4 threads ready to go! On to the final one.
(Ready to up your sewing game? Don't forget about building up a good sewing kit first. Grab your complete beginner's guide & shopping list below!) 
How to thread a serger: Step 4

And alas, for the final (and most difficult) thread on the Brother 1034D serger.
As with the previous thread cone, repeat the threading process for steps #1, #2, #3, & #4. Continue pulling the thread down, and secure it behind the metal hook labeled #5 in BLUE. Pull the thread to the left, underneath both of the metal hooks, labeled steps #6 & #7.
Next, pull the thread up slightly diagonally, through the #8 hook. To the left of that hook, you'll be able to see a blue arrow that goes both ways. Gently pull that little clip to the right, to pull out that little metal piece.

With that metal piece pulled out, hook the thread to the left of the tiny metal hook that sticks out. With that secure, push the metal piece back inside the machine. Pull the thread up, and thread the horizontal needle sticking out to the RIGHT.
With the needle threaded, pull the thread up underneath the third tread (i.e. the "green" thread) and back behind the sewing foot. You'll most likely need tweezers for this part of the process, unless you have the tiny, nimble fingers of a child.
How to thread a serger: Step 5
And with that, your Brother 1034D serger is officially threaded!
I always recommend stitching a sample raw edge, to ensure that the thread tension is correct. If the finished serger stitch is puckering or pulling, then look at the finished stitch and determine which thread is causing the issue.
Adjust the colored tension dial accordingly, and stitch out another sample.

Repeat the process until the finished serger stitch is flat and even.
It's always important to test on a sample piece of fabric before moving on to your final project.. Ripping out a finished serger stitch is incredibly difficult, because there is so much thread involved. Ripping the stitch out will only further deplete the frayed edges, so just test on a sample first.
It will take a few extra minutes, but will be so much more worth it in case there actually IS an issue with the thread tension.
(Ready to up your sewing game? Don't forget about building up a good sewing kit first. Grab your complete beginner's guide & shopping list below!) 
Sewing machine review: Ready to invest in a serger?
I waited a LONG time until I finally invested in a serger.. Way too long TBH.
But I have had my Brother 1034D serger for about 2 years now, and I love everything about it. Never had an issue, and it works beautifully. I only wish I had bought one years and years ago--My projects pre-serger look embarrassingly homemade compared to how I finish my projects off now.

And of course--There are actually a handful of different stitches that you can do with the Brother 1034D serger. I only went over the most basic stitch of them all, but there are other options.

I would love to know your thoughts on if that is something you guys would be interested in!
I've never actually used a stitch other than the basic one.. But might be fun to try out a few projects using a different stitch. Below are the actual specs of the Brother 1034D serger:
- Weight: 16 lbs
- Measurements: 11" x 12" x 13"
- Price: $199 on Amazon (I ended up getting mine slightly cheaper than this because my husband bought it for me around Christmastime when Amazon had a special deal going on!)
Seriously guys.. If you're looking to up your game when it comes to making your own clothes--Buy a serger. It doesn't have to be mine, but the Brother 1034D serger has worked perfectly for me over the years, it's easy to use, and it's at a great price point.
Any questions on how to work your serger? Let me know below!
(Ready to up your sewing game? Don't forget about building up a good sewing kit first. Grab your complete beginner's guide & shopping list below!) 






Julia Russ — January 5 2021
Hi Pam!
My instruction book says to do right to left as well — but I have always preferred to go left to right, not sure why. I’ve tried it both ways and never had an issue! xx
Pam Fuller — January 5 2021
I have a Brother 1034D but yours is slightly different in that you can make alterations to your knife and you have clips for first step of the thread to go through tension, but my instruction book tells me always to thread from right to left
Julia Russ — December 23 2020
Hi Carolina!
I will most definitely work on getting that put together! If you need the video ASAP, feel free to email me at julia@thefloramodiste.com and I will put one together right away and get it sent right back over. It might not be the most professional, but that way you’d have one quickly! xx
Carolina — December 23 2020
Can you do a video to show this steps